Saturday, January 31, 2009

How to fix "Windows XP could not start the following is missing or corrupt"

A corrupt registry is the usual headaches for most of the computer users. Registry is an important part of your Windows operating system, it is what we call the central space. It stores all data on your PC, then a small error can cause big
problems.

Yesterday I was called to repair a friends PC, because his PC receives an error when he tries to start Windows XP. He thinks of reformatting the PC but has chosen to call me first to seek advice. Below is the error, he receives when loading Windows XP. Luckily I was able to rescue him from formatting his PC.


Use the procedures that you can follow to be able to restore a corrupted registry, and usually start up again on Windows XP. The procedures below also applies to the following registry key errors.
  • Windows XP could not start because the following file is missing or corrupt: \ WINDOWS \ system32 \ config \ system

  • Windows XP could not start because the following file is missing or corrupt: \ WINDOWS \ system32 \ config \ software

  • Stop: c0000218 (Registry File Failure) The registry administrator can not load the hive (file): \ SystemRoot \ System32 \ Config \ SOFTWARE or its log or alternate.
Start Recovery Console

To fix registry errors, you need Windows XP Recovery Console. You can start from a Windows XP CD or boot directly to the Recovery Console.

Follow these steps to boot into Windows XP Recovery Console
  • Put your Windows XP CD-ROM drive

  • Restart your computer, make sure that your BIOS is set to boot from CD

  • When you see the "Press any key to boot from CD ..." press the space bar or any key.

  • Wait until you see the "Welcome to Setup" screen, press R to start the Recovery Console

  • Choose the Windows installation that you want to load

  • Enter password and press Enter

  • You should now be at C: \ Windows> prompt

  • Repair Copy files via Recovery Console


If your Windows installation is on another drive you replace the drive letter in the procedure below.

At the Recovery Console command prompt, type the following lines and press ENTER after each line:

md tmp
copy c: \ Windows \ system32 \ config \ system c: \ windows \ tmp \ system.bak
copy c: \ Windows \ system32 \ config \ software c: \ windows \ tmp \ software.bak
copy c: \ Windows \ system32 \ config \ sam c: \ windows \ tmp \ sam.bak
copy c: \ Windows \ system32 \ config \ security c: \ windows \ tmp \ security.bak
copy c: \ Windows \ system32 \ config \ default c: \ windows \ tmp \ default.bak

delete the C: \ Windows \ system32 \ config \ system
delete the C: \ Windows \ system32 \ config \ software
delete the C: \ Windows \ system32 \ config \ Sam
delete the C: \ Windows \ system32 \ config \ security
delete the C: \ Windows \ system32 \ config \ default

copy c: \ windows \ repair \ system c: \ Windows \ system32 \ config \ system
copy c: \ windows \ repair \ software c: \ Windows \ system32 \ config \ software
copy c: \ windows \ repair \ Sam C: \ Windows \ system32 \ config \ Sam
copy c: \ windows \ repair \ security c: \ Windows \ system32 \ config \ security
copy c: \ windows \ repair \ default c: \ Windows \ system32 \ config \ default

Quit Recovery Console by typing "exit." When the computer restarts, press F8 and then select Safe Mode

Restart in Safe Mode and a Recent Snapshot Backup

Restart the computer in Safe Mode by pressing F8 during the initial bootup and select Safe Mode. Once in Safe Mode, make sure the files and folders are visible so you can access them. Follow these instructions to achieve this.
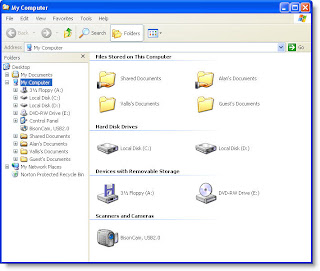
  1. Open My Computer

  2. Click the Tools menu and then click Folder Options.

  3. Click the View tab.

  4. Under Hidden files and folders, click to select Show hidden files and folders, and then click to clear the Hide protected operating system files (Recommended) check box.

  5. Click Yes when the dialog box that confirms that you want to display these files appears.
In My Computer, double-click the drive where you installed Windows XP (usually drive C) to view a list of folders. Then double-click "System Volume Information" folder. This folder contains the system restore points stored on your computer. The folders are similar
_restore (EE42BEB8-700A-495F-8004-53D26C2E12C5)
You may receive an Access Denied error message when trying to access the System Volume Information folder.
C: \ System Volume Information is not available. Access is denied.
You received this error message because you are logged into folder that does not have permissions set on the folder. To correct this, please follow the instructions in Microsoft Knowledge Base article 309531 to access and continue.


Once you have access to snapshots, use the following instructions to copy one of the latest snapshots for Windows \ TMP folder, so you have access to it.
  1. The System Volume Information folder, click View, then click Details to display the date of each snapshot folder.

  2. Open a folder that was created at the current time, but rather before the problem began.

  3. Open Snapshot subfolder

  4. Check the following files and copy and paste them into C: \ Windows \ TMP folder
    • _REGISTRY_USER_.DEFAULT
    • _REGISTRY_MACHINE_SECURITY
    • _REGISTRY_MACHINE_SOFTWARE
    • _REGISTRY_MACHINE_SYSTEM
    • _REGISTRY_MACHINE_SAM

  5. Rename the files that you just copied into the C: \ Windows \ TMP folder.
    • Rename _REGISTRY_USER_.DEFAULT to DEFAULT
    • Rename _REGISTRY_MACHINE_SECURITY for security
    • Rename _REGISTRY_MACHINE_SOFTWARE software
    • Rename _REGISTRY_MACHINE_SYSTEM for system
    • Rename _REGISTRY_MACHINE_SAM to SAM

  6. When your done rename files, restart your computer again with the Recovery Console


Replace Repair files with a current backup of the Registry

In the Recovery Console again, type the following commands at the prompt to replace the files with a current backup. You must press ENTER after each command.

Part C: \ Windows \ system32 \ config \ Sam
Part C: \ Windows \ system32 \ config \ security
Part C: \ Windows \ system32 \ config \ software
Part C: \ Windows \ system32 \ config \ default
Part C: \ Windows \ system32 \ config \ system

copy c: \ windows \ tmp \ software c: \ Windows \ system32 \ config \ software
copy c: \ windows \ tmp \ system c: \ Windows \ system32 \ config \ system
copy c: \ windows \ tmp \ Sam C: \ Windows \ system32 \ config \ Sam
copy c: \ windows \ tmp \ security c: \ Windows \ system32 \ config \ security
copy c: \ windows \ tmp \ default c: \ Windows \ system32 \ config \ default

Once the files have been changed, type exit at the command prompt to restart Windows in Normal mode.


Using System Restore to return to a good Backup Point

Because there is more to a System Restore than just the registry files, follow these steps to restore your computer to a good backup point.
  1. Click Start, then click All Programs.

  2. Click on Accessories, then click System Tools.

  3. Click System Restore, and then click Restore to a previous restore point and finish the restore process.

Tuesday, January 27, 2009

Microsoft Internet Explorer Navigation Keyboard Shortcuts:


CTRL+B (Open the Organize Favorites dialog box)
CTRL+E (Open the Search bar)
CTRL+F (Start the Find utility)
CTRL+H (Open the History bar)
CTRL+I (Open the Favorites bar)
CTRL+L (Open the Open dialog box)
CTRL+N (Start another instance of the browser with the same Web address)
CTRL+O (Open the Open dialog box, the same as CTRL+L)
CTRL+P (Open the Print dialog box)
CTRL+R (Update the current Web page)
CTRL+W (Close the current window)

Microsoft Management Console (MMC) Main Window Keyboard Shortcuts:

• CTRL+O (Open a saved console)
• CTRL+N (Open a new console)
• CTRL+S (Save the open console)
• CTRL+M (Add or remove a console item)
• CTRL+W (Open a new window)
• F5 key (Update the content of all console windows)
• ALT+SPACEBAR (Display the MMC window menu)
• ALT+F4 (Close the console)
• ALT+A (Display the Action menu)
• ALT+V (Display the View menu)
• ALT+F (Display the File menu)
• ALT+O (Display the Favorites menu)


MMC Console Window Keyboard Shortcuts:

• CTRL+P (Print the current page or active pane)
• ALT+Minus sign (-) (Display the window menu for the active console window)
• SHIFT+F10 (Display the Action shortcut menu for the selected item)
• F1 key (Open the Help topic, if any, for the selected item)
• F5 key (Update the content of all console windows)
• CTRL+F10 (Maximize the active console window)
• CTRL+F5 (Restore the active console window)
• ALT+ENTER (Display the Properties dialog box, if any, for the selected item)
• F2 key (Rename the selected item)
• CTRL+F4 (Close the active console window. When a console has only one console window, this shortcut closes the console)


Remote Desktop Connection Navigation:

• CTRL+ALT+END (Open the Microsoft Windows NT Security dialog box)
• ALT+PAGE UP (Switch between programs from left to right)
• ALT+PAGE DOWN (Switch between programs from right to left)
• ALT+INSERT (Cycle through the programs in most recently used order)
• ALT+HOME (Display the Start menu)
• CTRL+ALT+BREAK (Switch the client computer between a window and a full screen)
• ALT+DELETE (Display the Windows menu)
• CTRL+ALT+Minus sign (-) (Place a snapshot of the entire client window area on the Terminal server clipboard and provide the same functionality as pressing ALT+PRINT SCREEN on a local computer.)
• CTRL+ALT+Plus sign (+) (Place a snapshot of the active window in the client on the Terminal server clipboard and provide the same functionality as pressing PRINT SCREEN on a local computer).

Microsoft Natural Keyboard Shortcuts:


Windows Logo (Display or hide the Start menu)
• Windows Logo+BREAK (Display the System Properties dialog box)
• Windows Logo+D (Display the desktop)
• Windows Logo+M (Minimize all of the windows)
• Windows Logo+SHIFT+M (Restore the minimized windows)
• Windows Logo+E (Open My Computer)
• Windows Logo+F (Search for a file or a folder)
• CTRL+Windows Logo+F (Search for computers)
• Windows Logo+F1 (Display Windows Help)
• Windows Logo+ L (Lock the keyboard)
• Windows Logo+R (Open the Run dialog box)
• Windows Logo+U (Open Utility Manager)

Accessibility Keyboard Shortcuts:

• Right SHIFT for eight seconds (Switch FilterKeys either on or off)
• Left ALT+left SHIFT+PRINT SCREEN (Switch High Contrast either on or off)
• Left ALT+left SHIFT+NUM LOCK (Switch the MouseKeys either on or off)
• SHIFT five times (Switch the StickyKeys either on or off)
• NUM LOCK for five seconds (Switch the ToggleKeys either on or off)
• Windows Logo +U (Open Utility Manager)


Windows Explorer Keyboard Shortcuts:

• END (Display the bottom of the active window)
• HOME (Display the top of the active window)
• NUM LOCK+Asterisk sign (*) (Display all of the subfolders that are under the selected folder)
• NUM LOCK+Plus sign (+) (Display the contents of the selected folder)
• NUM LOCK+Minus sign (-) (Collapse the selected folder)
• LEFT ARROW (Collapse the current selection if it is expanded, or select the parent folder)
• RIGHT ARROW (Display the current selection if it is collapsed, or select the first subfolder)

Windows Keyboard Shortcuts

General Keyboard Shortcuts:

CTRL+C (Copy)
CTRL+X (Cut)
CTRL+V (Paste)
CTRL+Z (Undo)
DELETE (Delete)
SHIFT+DELETE (Delete the selected item permanently without placing the item in the Recycle Bin)
CTRL while dragging an item (Copy the selected item)
CTRL+SHIFT while dragging an item (Create a shortcut to the selected item)
F2 key (Rename the selected item)
CTRL+RIGHT ARROW (Move the insertion point to the beginning of the next word)
CTRL+LEFT ARROW (Move the insertion point to the beginning of the previous word)
CTRL+DOWN ARROW (Move the insertion point to the beginning of the next paragraph)
CTRL+UP ARROW (Move the insertion point to the beginning of the previous paragraph)
CTRL+SHIFT with any of the arrow keys (Highlight a block of text)
SHIFT with any of the arrow keys (Select more than one item in a window or on the desktop, or select text in a document)
CTRL+A (Select all)
F3 key (Search for a file or a folder)
ALT+ENTER (View the properties for the selected item)
ALT+F4 (Close the active item, or quit the active program)
ALT+ENTER (Display the properties of the selected object)
ALT+SPACEBAR (Open the shortcut menu for the active window)
CTRL+F4 (Close the active document in programs that enable you to have multiple documents open simultaneously)
ALT+TAB (Switch between the open items)
ALT+ESC (Cycle through items in the order that they had been opened)
F6 key (Cycle through the screen elements in a window or on the desktop)
F4 key (Display the Address bar list in My Computer or Windows Explorer)
SHIFT+F10 (Display the shortcut menu for the selected item)
ALT+SPACEBAR (Display the System menu for the active window)
CTRL+ESC (Display the Start menu)
ALT+Underlined letter in a menu name (Display the corresponding menu)
• Underlined letter in a command name on an open menu (Perform the corresponding command)
F10 key (Activate the menu bar in the active program)
RIGHT ARROW (Open the next menu to the right, or open a submenu)
LEFT ARROW (Open the next menu to the left, or close a submenu)
F5 key (Update the active window)
BACKSPACE (View the folder one level up in My Computer or Windows Explorer)
ESC (Cancel the current task)
SHIFT when you insert a CD-ROM into the CD-ROM drive (Prevent the CD-ROM from automatically playing)

Dialog Box Keyboard Shortcuts:

CTRL+TAB (Move forward through the tabs)
CTRL+SHIFT+TAB (Move backward through the tabs)
TAB (Move forward through the options)
SHIFT+TAB (Move backward through the options)
ALT+Underlined letter (Perform the corresponding command or select the corresponding option)
ENTER (Perform the command for the active option or button)
SPACEBAR (Select or clear the check box if the active option is a check box)
Arrow keys (Select a button if the active option is a group of option buttons)
F1 key (Display Help)
F4 key (Display the items in the active list)
BACKSPACE (Open a folder one level up if a folder is selected in the Save As or Open dialog box)

Difference between IPv4 vs IPv6

Introduction::

IPv4 is currently the dominant Internet Protocol version, and was the first to receive widespread use.

The Internet Engineering Task Force (IETF) has designated IPv6 as the successor to version 4 for general use on the Internet. It significantly increases the size of the address space used to identify communication endpoints in the Internet, thereby allowing it to continue its tremendous growth rate.

IPv6 is also said to be IPng (IP Next Generation).

Limitations in IPv4:

Up to now we are using IPv4.
IPv4 was remarkably but in spite of that it is beginning to have problems. Most importantly, there is a growing shortage of IPv4 addresses, which are needed by all new machines added to the Internet.

The limited address range forces organizations to use Network Address Translation (NAT) firewalls to map multiple private addresses to a single public IP address.NATs does not support standards-based network-layer security and also creates complicated barriers to VoIP, and other services.

Security was also an issue for IPv4. Although there are lots of ways of encrypting IPv4 traffic, such as using the IPSec protocol, but unfortunately all of the IPv4 encryption methods are proprietary and no real standard encryption methods exist.

IPv6 Features:

The IPv6 header has a new header format that is designed to minimize header overhead. This optimization is achieved by moving both non-essential fields and optional fields to extension headers that appear after the IPv6 header. Intermediate routes can process the streamlined IPv6 header more efficiently. IPv4 headers and IPv6 headers do not interoperate. IPv6 is not a superset of functionality, that is backward compatible with IPv4 is not possible. A host or router must use an implementation of both IPv4 and IPv6 to recognize and process both header formats. The IPv6 header is only twice as large as the IPv4 header, even though IPv6 addresses are four times as large as IPv4 addresses.


  • IPv6 features a larger address space than that of IPv4.
  • IPv6 offers a higher level of built-in security, and it has been specifically designed with mobile devices in mind.
  • Unlike mobile IPv4, Mobile IPv6 (MIPv6) avoids triangular routing and is therefore as efficient as normal IPv6.
  • IPv6 can easily be extended by adding extension headers after the IPv6 header.
  • IPv4 limits packets to 64 KB of payload. IPv6 has optional support for packets over this limit, referred to as jumbograms, which can be as large as 4 GB.
  • The use of jumbograms may improve performance over high-MTU networks. The presence of jumbograms is indicated by the Jumbo Payload Option header
  • IPv6 also includes standardized support for QoS.
Difference Between IPv4 and IPv6

IPv4

  • Source and destination addresses are 32 bits (4 bytes) in length.
  • IPSec support is optional.
  • IPv4 header does not identify packet flow for QoS handling by routers.
  • Both routers and the sending host fragment packets.
  • Header includes a checksum.
  • Header includes options.
  • Address Resolution Protocol (ARP) uses broadcast ARP Request frames to resolve an IP address to a link-layer address.
  • Internet Group Management Protocol (IGMP) manages membership in local subnet groups.
  • ICMP Router Discovery is used to determine the IPv4 address of the best default gateway, and it is optional.
  • Broadcast addresses are used to send traffic to all nodes on a subnet.
  • Must be configured either manually or through DHCP.
  • Uses host address (A) resource records in Domain Name System (DNS) to map host names to IPv4 addresses.
  • Uses pointer (PTR) resource records in the IN-ADDR.ARPA DNS domain to map IPv4 addresses to host names.
  • Must support a 576-byte packet size.
IPv6

  • Source and destination addresses are 128 bits (16 bytes) in length.
  • IPSec support is required.
  • IPv6 header contains Flow Label field, which identifies packet flow for QoS handling by router.
  • Only the sending host fragments packets; routers do not.
  • Header does not include a checksum.
  • All optional data is moved to IPv6 extension headers.
  • Multicast Neighbor Solicitation messages resolve IP addresses to link-layer addresses.
  • Multicast Listener Discovery (MLD) messages manage membership in local subnet groups.
  • ICMPv6 Router Solicitation and Router Advertisement messages are used to determine the IP address of the best default gateway, and they are required.
  • IPv6 uses a link-local scope all-nodes multicast address.
  • Does not require manual configuration or DHCP.
  • Uses host address (AAAA) resource records in DNS to map host names to IPv6 addresses.
  • Uses pointer (PTR) resource records in the IP6.ARPA DNS domain to map IPv6 addresses to host names.
  • Must support a 1280-byte packet size .


Monday, January 26, 2009

About Intel Core i7 i7-965 Processor

Intel Core i7 i7-965 Processor

Intel Core i7 i7-965 Processor

(3.2GHz, 4x1MB, 6.4GT/s QPI, LGA1366 Socket B - MPN: BX80601965)
Price Range: $1,019.99 - $1,122.67 from 10 Sellers
Description: The Intel Core i7 processor features a 4-core, 8 software thread design with Intel Hyper-Threading Technology. Combined with Intel Turbo Boost technology, which accelerates the processor to match your workload, you'll get incredible performance no matter what your computing needs.


Collapse All Sections
Description: Core i7 i7-965 Quad Core Processor
Manufacturer: Intel
Lowest Price: $1,019.99
User Reviews: Not Rated
Rebates: (None)
Quick Glance
Processor Class: Intel Core i7
Processor Socket: Intel Socket B (LGA 1336)
Processor Type: 4
Bus Speed: 6.4 GT/s
Processor Speed: 3200
Processor Speed + Class
Bus Speed: 6.4 GT/s
Processor Speed: 3.2 GHz
Processor Class: Intel Core i7
Physical + Memory Specifications
L3 Cache Size: 8 MB
L2 Cache Size: 1 MB
Number of Processor Cores: 4
Processor Socket: Intel Socket B (LGA 1336)
Warranty
Warranty Information: 3 Year Limited Warranty
More Info
General