An easy way to enjoy the benefits of multibooting without the pitfalls is to use Virtual PC 2007. It's a free download from Microsoft you can use to install multiple operating systems on your computer, and then switch between them as easily as you switch between programs.
You can download Virtual PC 2007 from the Microsoft Virtual PC 2007 website.
How to set up a virtual machine
Follow the instructions on your screen to install the program.


After installation is complete, you'll create a virtual machine and a virtual disk for it to use. (Each virtual machine requires at least one virtual hard disk.) You can then install your additional operating system on the virtual machine. You'll need the installation disc or other installation media for the operating system and a valid product key.
If you no longer want the virtual machine on your computer, or want to reclaim the disk space used by the virtual hard disk, you can delete the virtual machine files in the My Virtual Machines folder, which is created in your Documents folder on the host computer when you install Virtual PC 2007. If you delete a virtual hard disk, any data stored on the virtual hard disk will also be deleted. Be sure to save any data that you want to keep to another location before you delete the virtual hard disk.
To create a virtual machine and a virtual disk on the host computer
- Click Start, click All Programs, and then click Microsoft Virtual PC.
- In the New Virtual Machine Wizard, click Next.
- Select Create a virtual machine, and then click Next.
- Type a name for the virtual machine, and then click Next.
- In the Operating system list, select the operating system you plan to install, and then click Next.
- Click Using the recommended RAM, and then click Next.
- Click A new virtual hard disk, and then click next.
- Type a name for the new virtual hard disk, and then click Next.
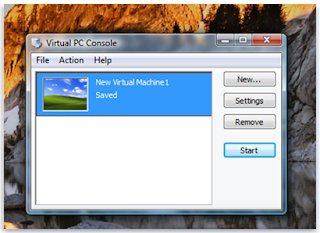
- Click Finish. The Virtual PC Console will display the virtual machine you just created.
To install an operating system on the new virtual machine
- In Virtual PC Console, click the virtual machine you want to install the operating system on, and then click Start.
- Because no operating system is installed yet, you'll see the following message: Reboot and Select proper Boot device or Insert Boot Media in selected Boot device.
- Ensure that the virtual machine window is the active window on your desktop, insert the installation disc for the operating system into the CD or DVD drive, and then press Enter.
- The installation should begin within the virtual machine window. Follow the instructions that will appear to install the operating system.
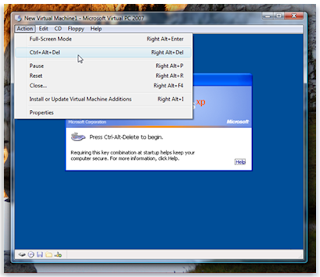
- To log in to the new virtual machine, click Action, click Ctrl+Alt+Del, type your user name and password, and then click Enter.

Now that the virtual machine is running your new operating system, you can install programs and create files, just as if it were a separate physical computer. For additional information on using Virtual PC 2007, open Virtual PC 2007, click Help and then click Virtual PC Help.
No comments:
Post a Comment